
You may use electronic service of process (eService) to serve opposing counsel in any case in California, regardless of whether the court allows for electronic court filing.
By creating an eService list to use in a case, you save yourself time adding parties individually in each filing.
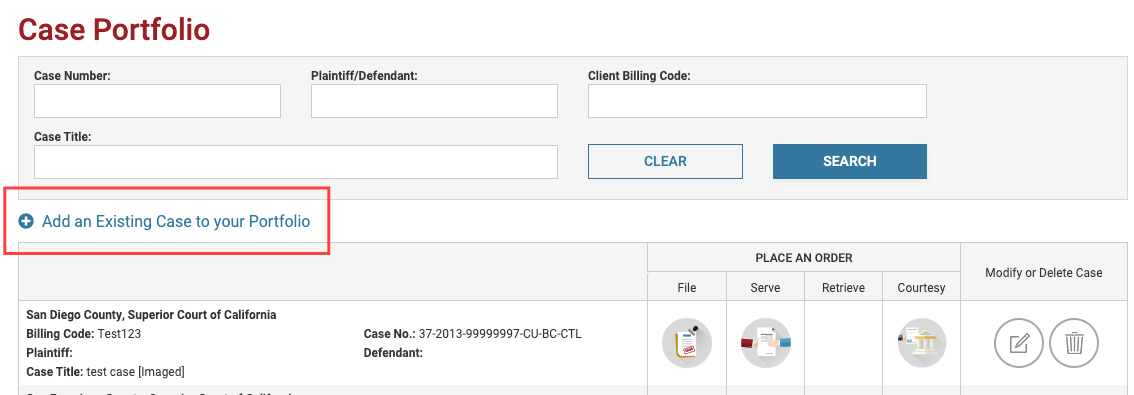
Step 1: Find or add your case to your Case Portfolio
If you've already filed papers, then your case likely already exists in your case portfolio. If your case is not present, from the home dashboard, click on Cases to open the Case Portfolio and then click on Add an Existing Case to your Portfolio.
Step 2: Create the eService list
Once your case has been added to your Case Portfolio, you can create the eService list.
Important: Per California court rules, it is your responsibility to obtain the appropriate electronic notification address from the other parties to the case and to ensure that it is accurate.
To add an eService list to an existing case, first click on the Modify button:
Next, select eService as the service option. Add the documents that you want to serve and move forward to the eService screen.
Click the Add new record button to add the name and email address for those you wish to eServe. Continue to add records until the list shows all the persons that you want to send eService to.
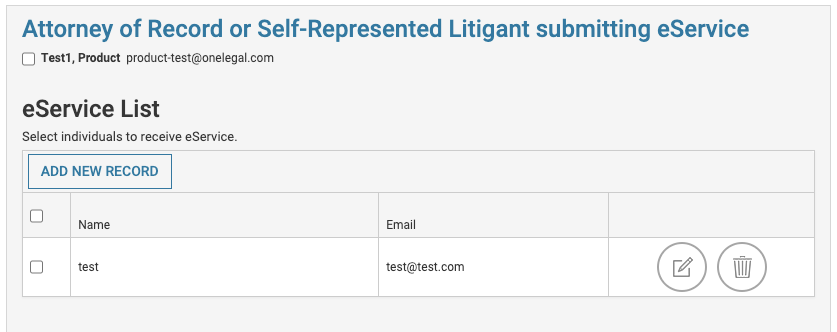
Once you have added all of the eService recipients, click on the Save to my Portfolio button to exit.
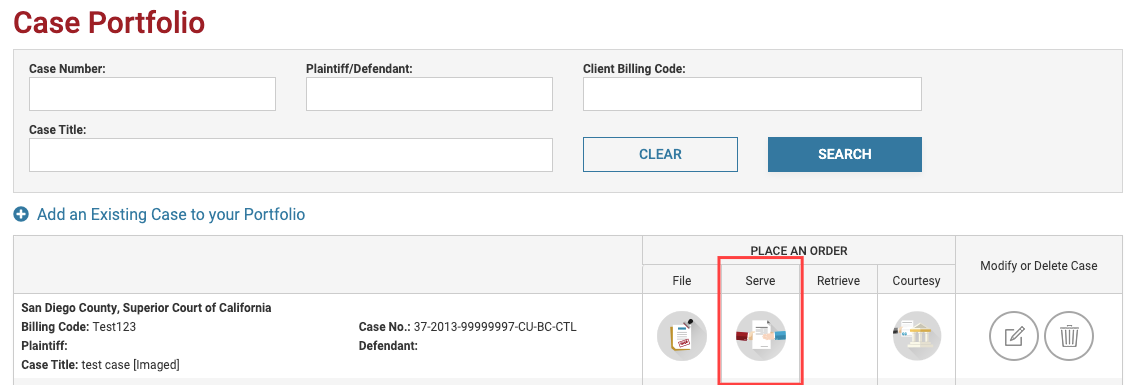
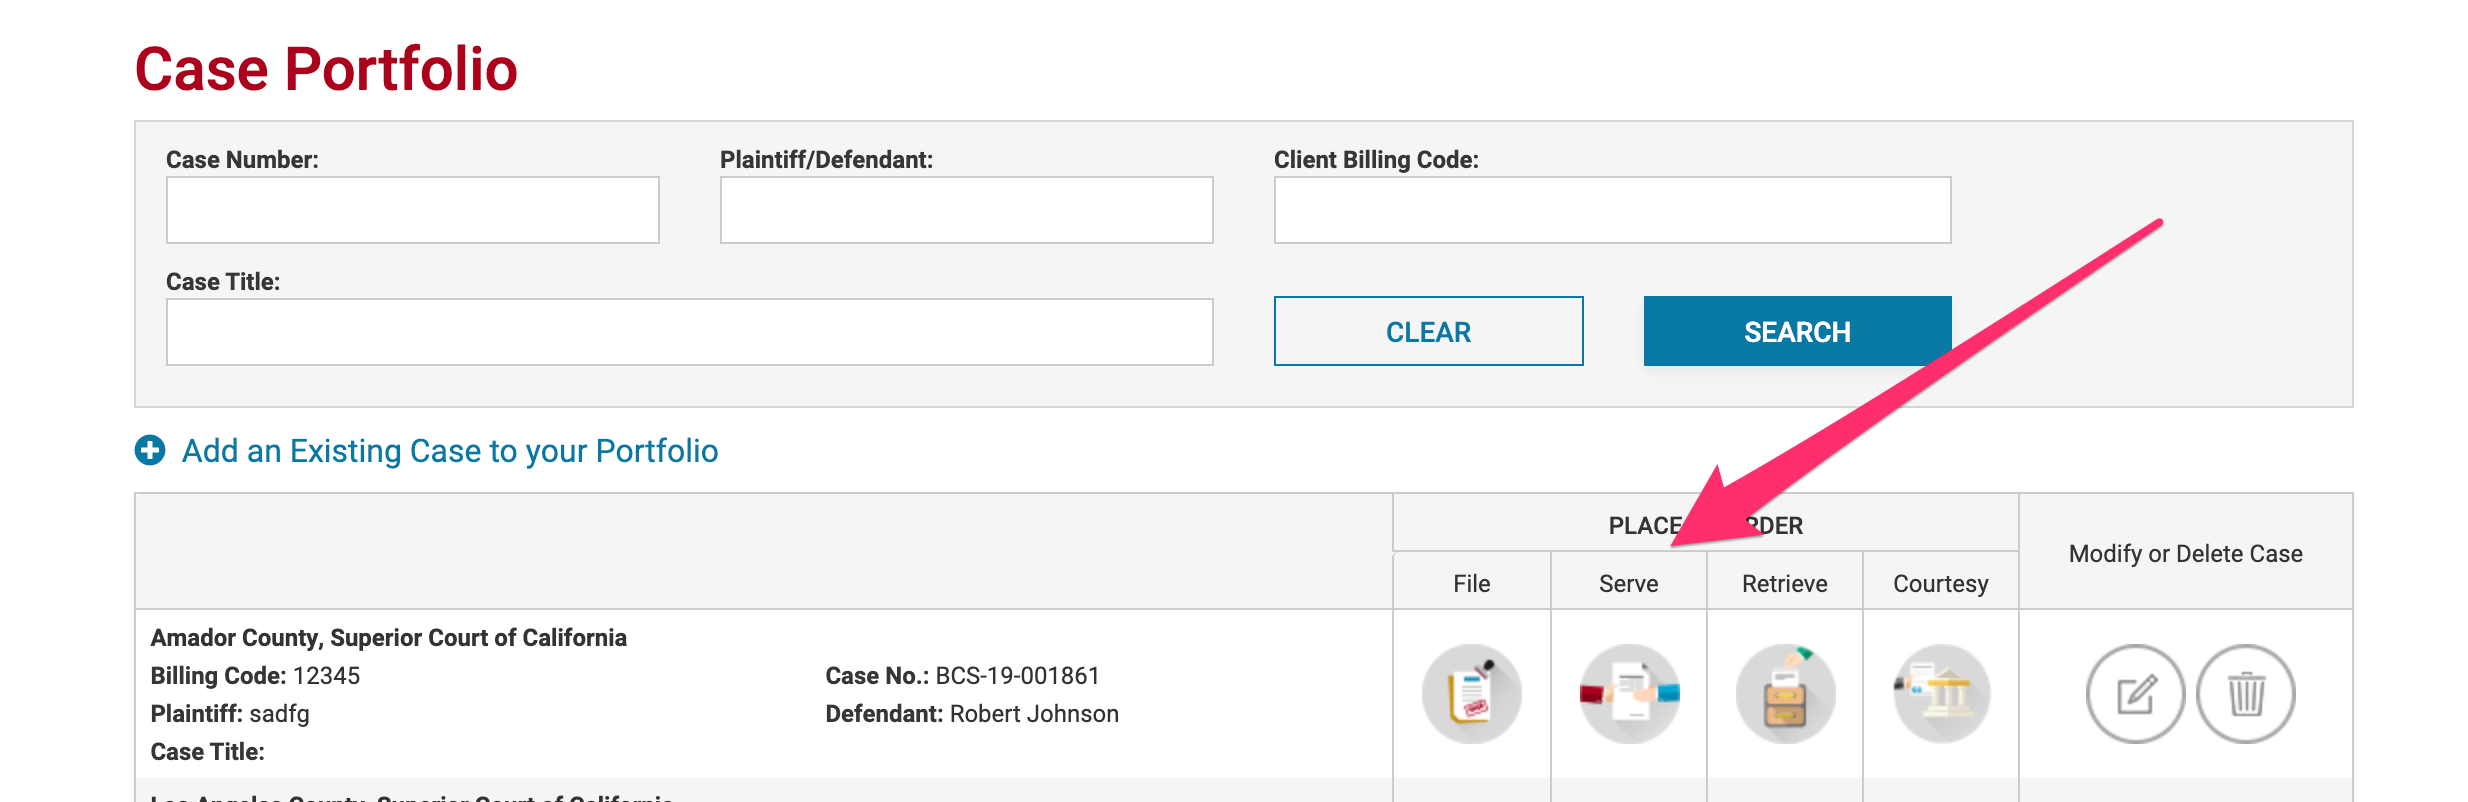
Step 3: Sending your eService notification
To send an eService notification, you should navigate to the appropriate case in your case portfolio. Once you have found the correct case, click on the Serve icon:
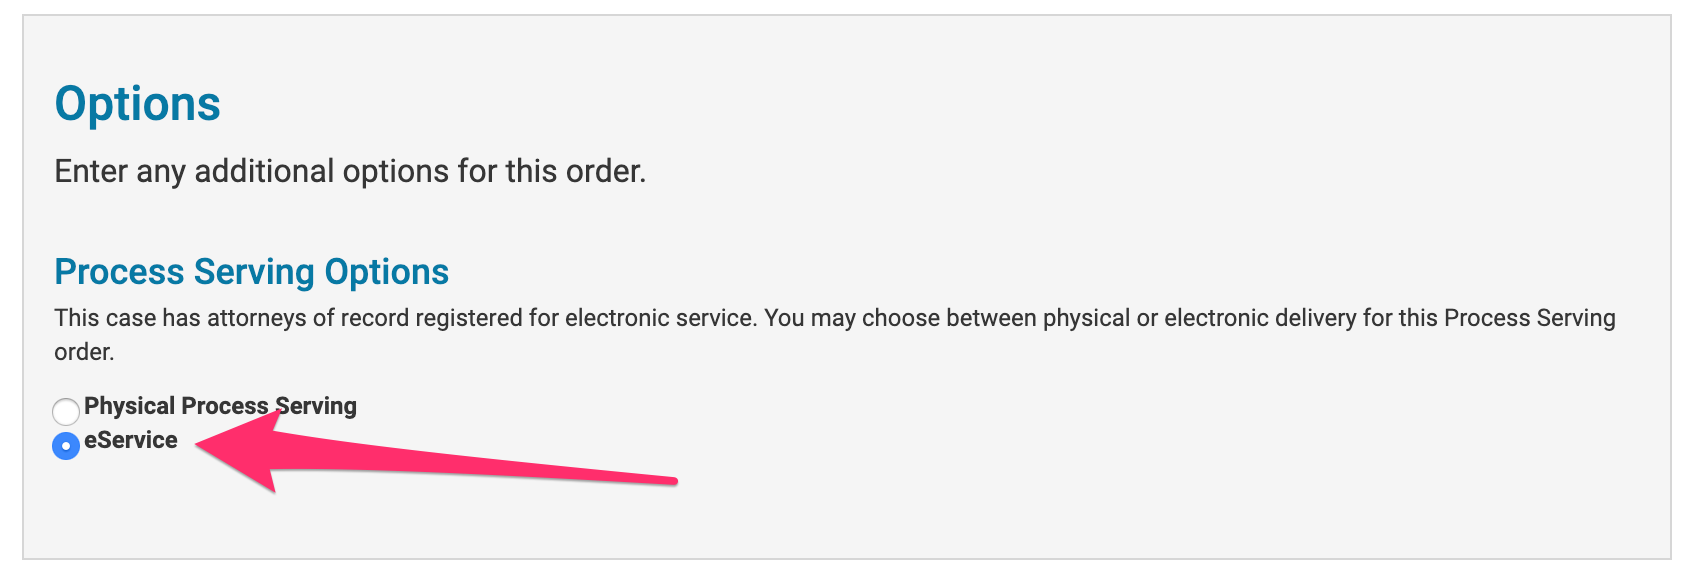
The Process Serving order workflow will open. You must ensure that you select eService in the options box on the Order Info tab:
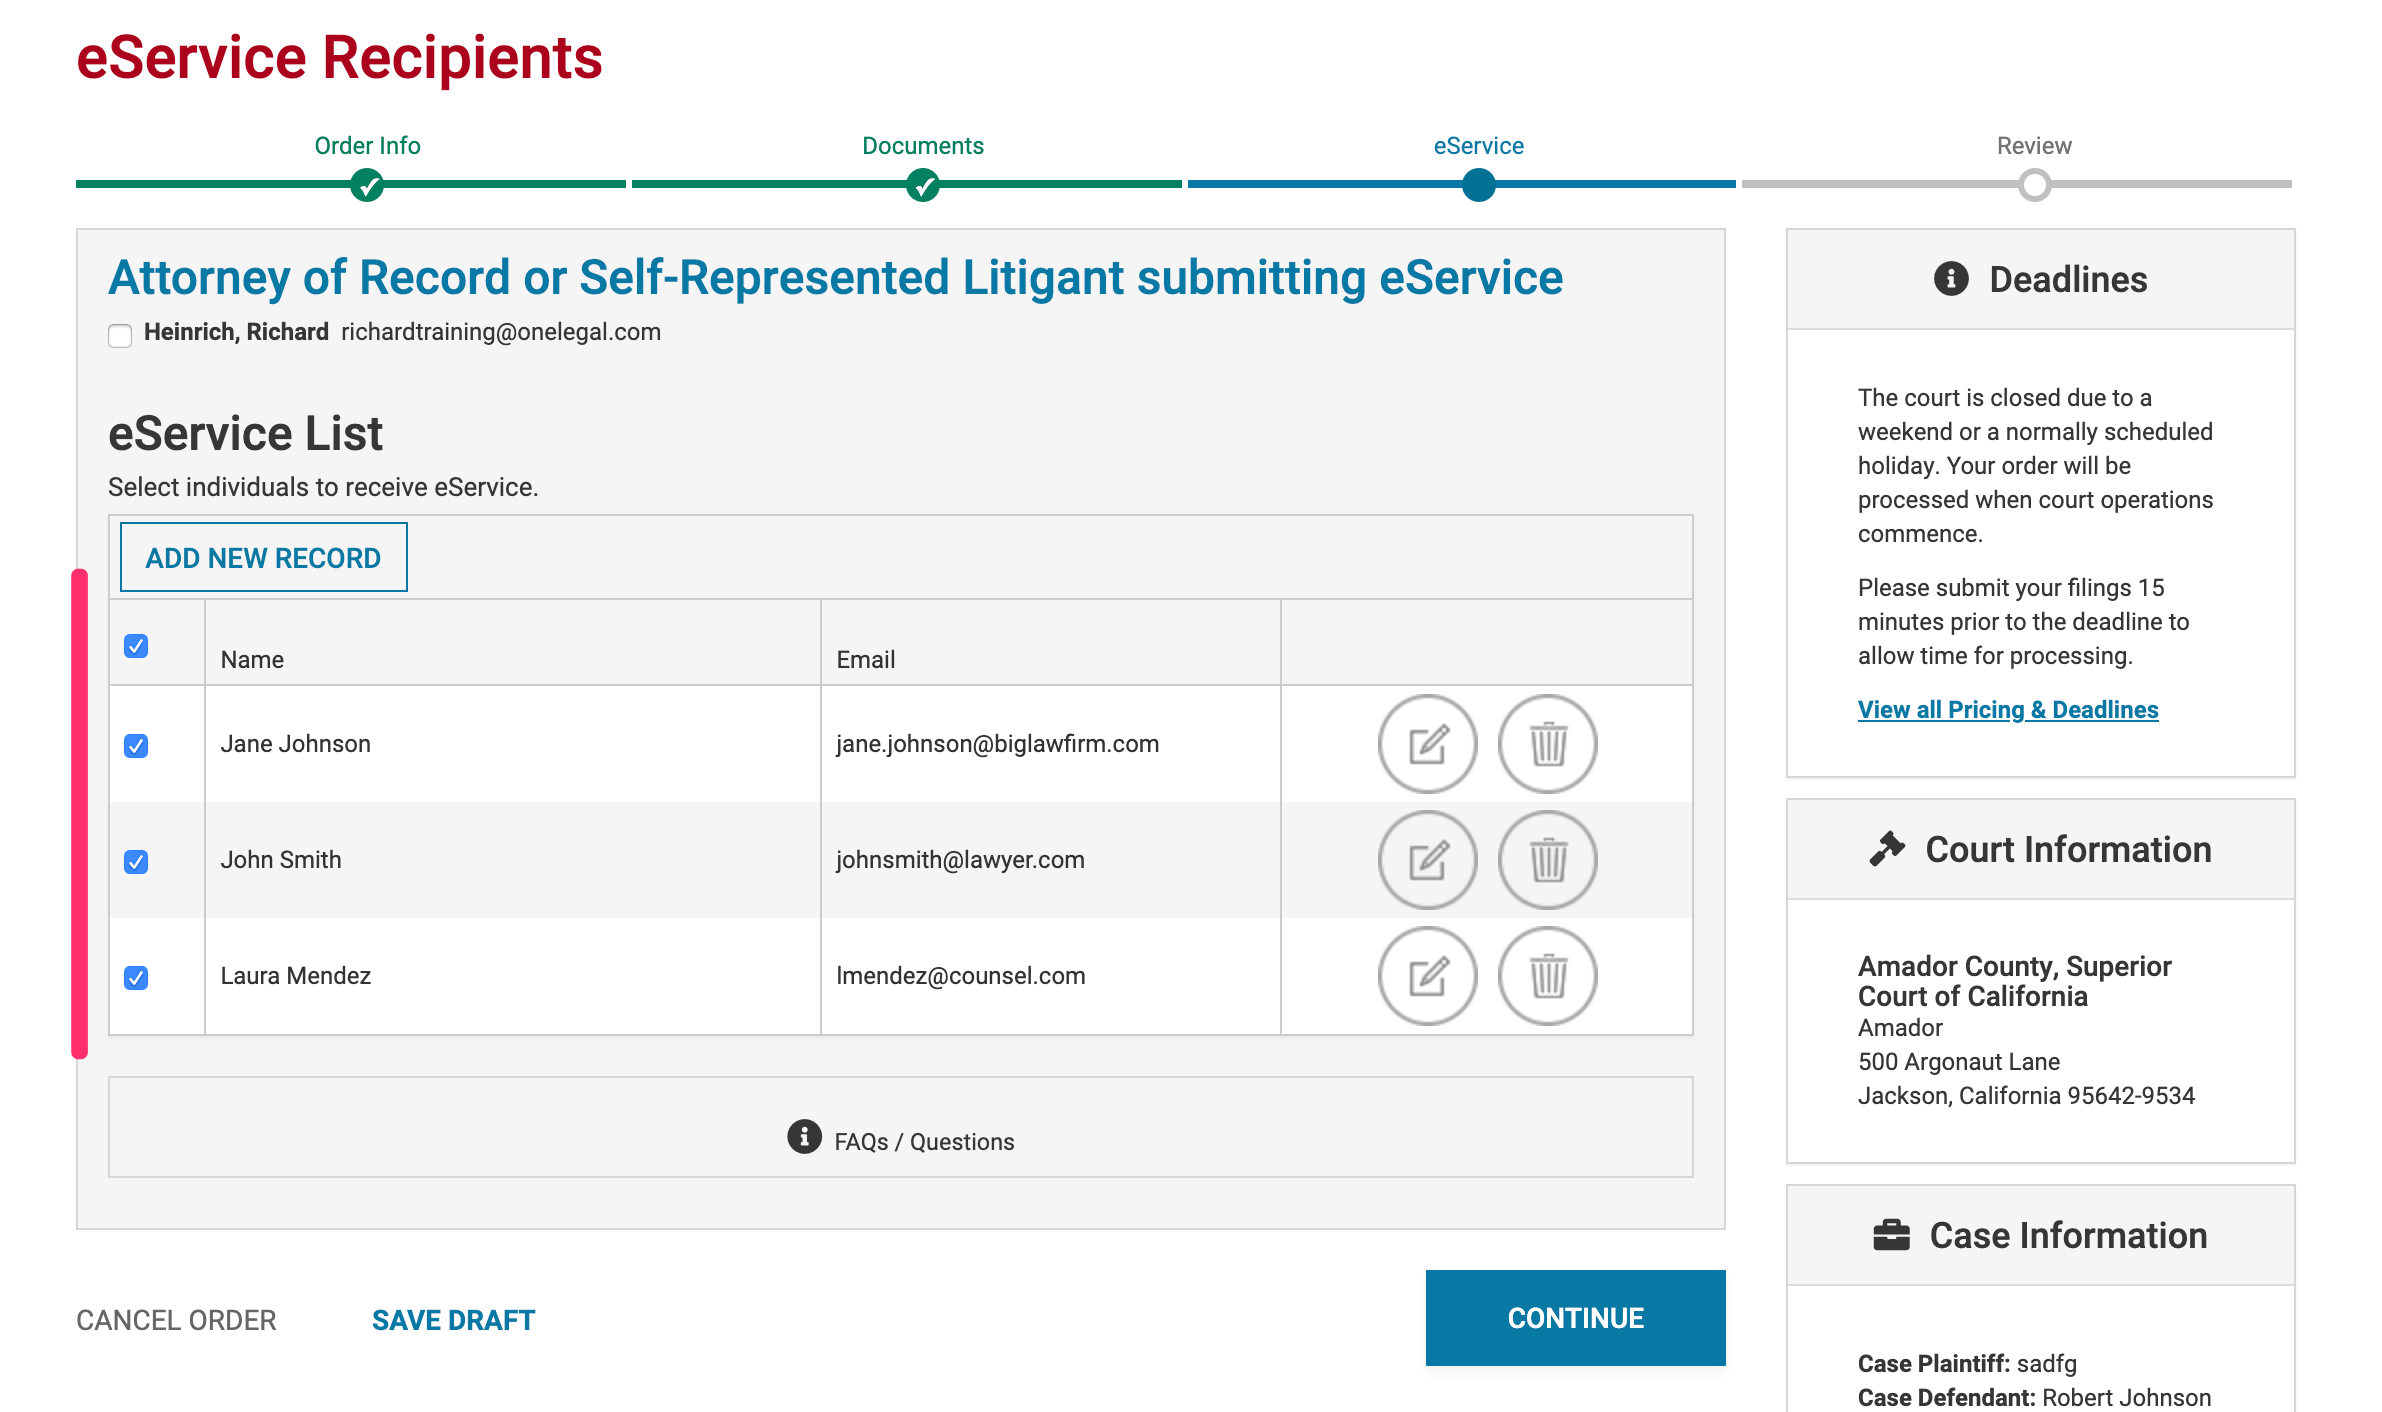
Attach the documents that you intend to serve and continue to the eService tab. You will be presented with the eService list you created in the Case Portfolio. You may add, modify, or remove recipients at this stage. To send your eService notification, you must select the individuals you wish to receive a notification. Be careful to ensure that there is a blue checkmark beside all individuals that you intend to serve:
Continue to the Order Review tab and submit. You will be able to track the status of your eServe on the Orders tab.